How to Center Clay on the Wheel: A Step-by-Step Guide for Beginners
Centering is where most beginners meet the wheel for the first time — really meet it. The clay lurches, your hands slide, and a lump that looked perfectly round a minute ago has developed a personality of its own. Nothing is wrong with you. Centering is a physical skill, and like any physical skill it is built from a handful of small, repeatable habits: where you sit, how fast the wheel turns, where the pressure comes from, and how much water is on the clay. Get those four things right and the wobble largely takes care of itself.
Set Your Body Before You Touch the Clay
Most centering problems are actually posture problems. Sit close enough to the wheel that your forearms can rest over the wheel head without leaning forward. If you have to stretch, you are too far away. If your chest is against the splash pan, you are too close and you will fight the machine all session.
Brace your elbows against your inner thighs or the tops of your knees. Not resting lightly — braced, so your forearms are supported and the pressure you apply comes from your body rather than your wrists. This is the single biggest change most beginners can make. When your elbows float in the air, every correction becomes a wrist movement, and wrists tire fast and drift.
Keep your feet flat and slightly apart, your spine leaning in a little, and your shoulders down. If your wheel sits on a stand, check the height: a comfortable setup lets you rest your forearms on the wheel head without hunching. Tall potters sometimes need a riser under the wheel; shorter potters sometimes need a lower stool. It is worth adjusting once, properly, rather than working around a bad setup for months.
Finally, wedge your clay before it goes anywhere near the wheel. Air pockets and uneven moisture will fight you no matter how good your hands are. A well-wedged ball, pressed firmly onto a damp wheel head or a bat, is a far better starting point than a lump torn straight off the block.
Wheel Speed: Fast to Center, Slow to Shape
Centering needs speed. The clay should move as a single mass under your hands, and that only happens when the wheel turns quickly enough that you feel the whole lump responding at once. A common beginner mistake is centering on a slow wheel and compensating with force — the clay drags, your wrists twist, and the lump starts to torque sideways.
So open the throttle for the coning stage. Fast enough that the clay turns smoothly and water does not fly everywhere. Once the clay is centered, drop the speed right down for opening and pulling. Fast wheels make the mass consistent; slow wheels make the form. Changing speed between those two stages, instead of leaving the pedal where it is, makes both jobs easier.
Water: Slick, Not Soupy
You want a thin film of slip between your hands and the clay so they glide. You do not want a puddle. Wet your hands and the clay, then let the wheel do the work. A sponge kept in a bowl beside you is better than pouring water over the wheel head.
Too much water softens the surface until the clay loses its structure and slides around rather than turning with you. If the clay starts to feel greasy, or you see water pooling at the base, stop adding water, sponge out the excess, and give it a moment. Clay that is too wet will not hold the center no matter how long you press.
The Cone: Up, Down, Centered
Coning is the classic centering method, and it works because it redistributes the clay's mass and evens out its moisture in one motion. Here is the sequence:
- Press your wedged ball firmly onto the middle of the wheel head and spin it up. Run a wet hand around the base so the clay seals to the head.
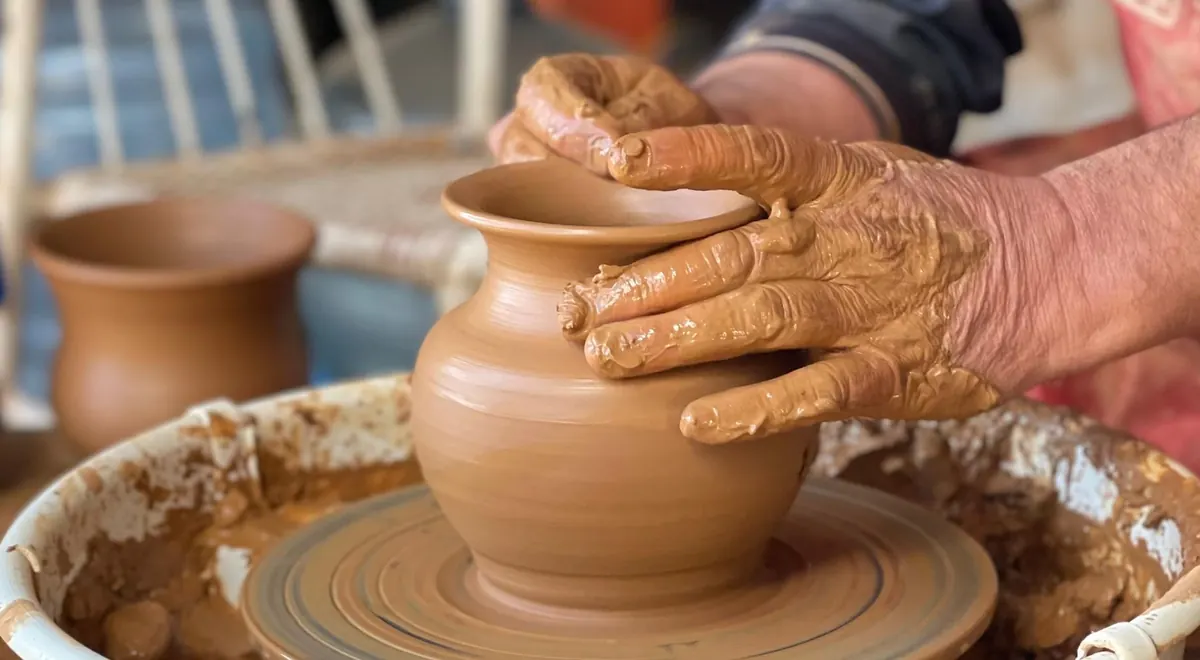
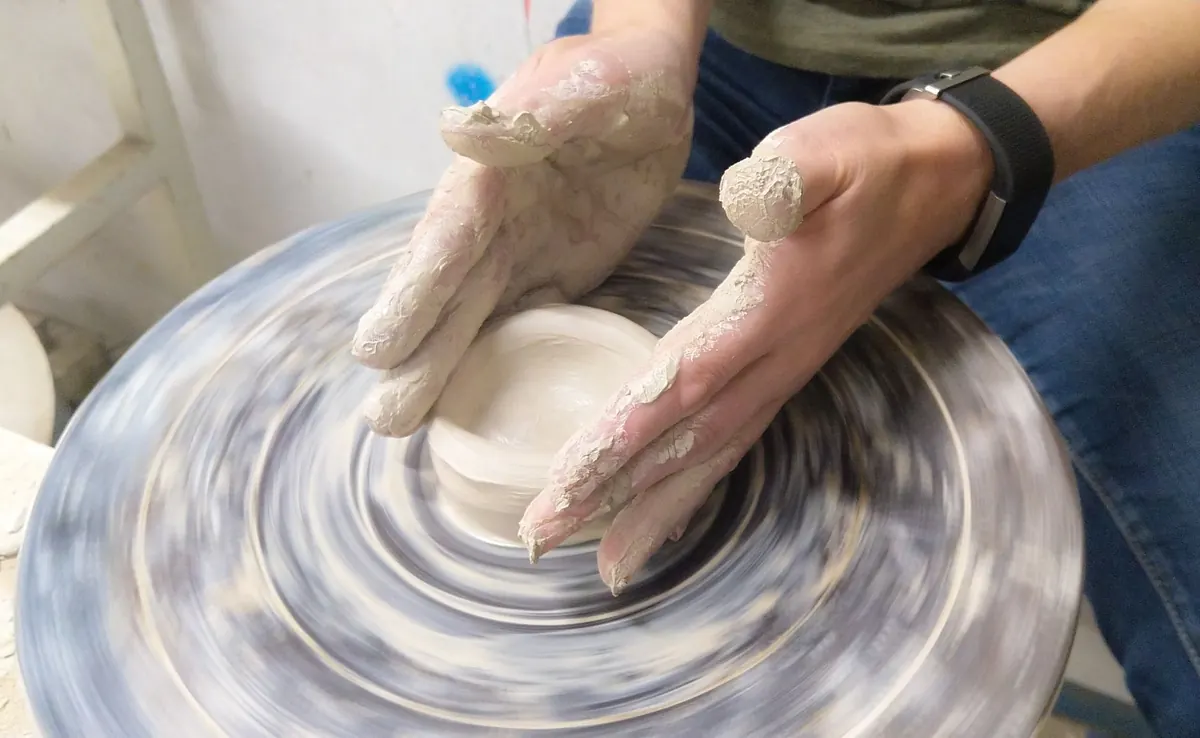
- Wet your hands and wrap both arms around the mound — left hand on the left, right hand on the right, forearms braced on your thighs.
- Cone up: press inward with the heels of both hands and lift steadily, drawing the clay up into a tall cone. Keep the pressure even on both sides.
- Cone down: with the heel of one hand on top of the cone and the other supporting the side, press down and slightly inward, flattening the cone back into a dome.
- Repeat two or three times. Each pass evens out the mass a little more.
- Finish by pressing inward and holding until the surface stops moving. That stillness is what centered feels like.
Do not rush the final hold. Beginners often release the moment the lump looks round, before the mass has truly settled. Count to five seconds with steady pressure. If the clay is still whispering under your hands, keep holding.
Where the Pressure Comes From
Push with the heels and the lower parts of your palms, not your fingertips. Fingers are for detail work later; the base of the hand is what moves a couple of kilos of clay. Think of squeezing the mass inward toward the center rather than shoving it, and keep both hands working as one unit. The hand on the left side is a support and a mirror, never a passenger.
Hold your contact point steady. Moving your hands around while centering breaks the pressure, lets the clay drift, and invites the wobble back. If you need to add water, do it with a sponge in one quick pass and return to the same grip. Keep your thumbs out of the equation as well; a hard thumb grip digs ridges you will spend the next ten minutes smoothing away.
Troubleshooting the Wobble
- The lump keeps wobbling after several passes: usually too much water, or the base is not sealed to the head. Sponge off the excess, re-seat the clay, cone again.
- The clay spirals and climbs your hands: too wet, too fast, or not enough downward pressure. Slow down slightly and add a little more push from above.
- It slips sideways and will not come back: the mass is too soft to correct. Set it aside to firm up on a bat and start again with a firmer ball.
- Your wrists ache after ten minutes: your elbows are floating. Brace them into your legs and let your body carry the load.
- It looks centered until you apply pressure: you have rounded the surface without settling the mass. Hold the squeeze longer, and cone one more time.
Practice Centering on Purpose
Give yourself ten or fifteen minutes at the start of each session just to center. Center a ball, cut it off the wheel, wedge it, and center it again. Cutting a centered cylinder vertically with a wire and looking at the wall thickness is the most honest feedback you can get — uneven walls almost always mean uneven pressure, and the cut tells you which side you are pushing harder.
Keep your practice pieces small at first, somewhere between a fist and a grapefruit. Small balls center faster, fail faster, and teach you more per hour than a big lump you are afraid to ruin. Nobody centers reliably on their first afternoon. It comes together after a few dozen repetitions, usually quite suddenly, when your hands stop guessing and start feeling where the mass is heavy.
Photo: ClickerHappy / Pexels
You Might Also Like
A practical field guide to finding, sampling, and testing wild clay along Italy’s coast, with safe collecting habits and simple tests for potters.
A practical costing checklist for small pottery studios, covering materials, kiln time, labor, overhead, and the wholesale and retail margins that turn a base cost into a fair shelf price.