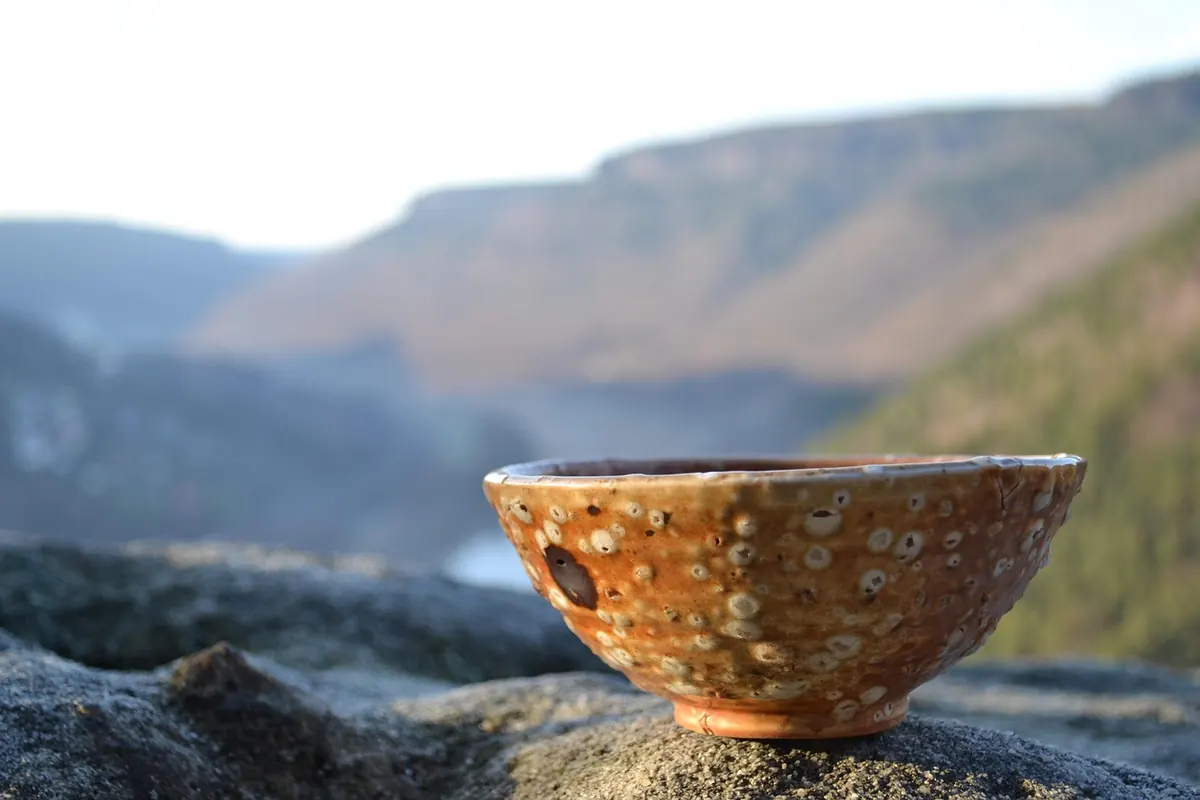
10 Common Glazing Mistakes and How to Avoid Them
Glaze is quiet and unforgiving. A pot that came off the wheel with a clean profile can leave the kiln with a bald patch on one flank, a gritty ring around the foot, or a sheet of glass welded to the shelf. The reasons are rarely mysterious. Most glazing faults come from a handful of habits — a rushed dip, a dusty rim, a bucket that hasn't been stirred since Tuesday. Fix the habits and the failures mostly stop. Below are ten mistakes that turn up again and again in studios of every size, along with the plain adjustments that keep them out of your kiln.
1. Uneven Coats and the One-Thick-Pass Habit
It is tempting to load a brush and cover the whole pot in a single sweep. The glaze goes on wet and heavy at the top, thin and streaky where the brush ran dry, and nothing looks quite level. In the firing, the heavy side runs and pools, the thin side breaks and shows bare clay, and the surface ends up looking tired.
Brush in thin layers instead. Three light coats, each brushed at right angles to the one before, give a far more even film than one heavy pass. Let each coat dry to a matte haze before adding the next — you can see the sheen go dull in a couple of minutes on a warm day.
Dip with a rhythm. Stir the bucket before every pot, because glaze settles quickly and the bottom of the bucket is always thicker than the top. Hold the pot in for the same count each time, rotate it halfway through, and lift it out smoothly rather than dragging it up one side. Glaze the inside first — pour, swirl, pour back — then dip or brush the outside. That order keeps your fingers off the wet exterior and stops the rim from collecting a double dose.
2. Dust, Oils, and the Crawling That Follows
Crawling is glaze pulling away from the clay during firing, leaving bare islands with thickened edges. It looks like a chemical fault but usually starts before the glaze touches the pot. Dust, skin oils, and overly thick application are the three usual culprits.
- Wipe bisque with a damp sponge and let it dry completely before glazing. This lifts the fine dust that prevents the glaze from gripping.
- Handle pots by the foot or with tongs. Lotion, hand cream and the natural oils on your palms all repel water-based glaze.
- Sieve your glaze if it has been sitting. Lumps don't melt out; they stay as bumps or crawl centres.
- Dust off after sanding bisque, and never handle a wiped pot with dirty hands.
- Keep the coat moderate, especially at rims and edges, where glaze naturally builds up and crawls first.
If a glaze crawls on one pot but behaves on others, suspect the wipe before you suspect the recipe. If it crawls on everything, the glaze may simply be shrinking too much against your clay body — make a test tile before committing a batch.
3. Glazing Where It Shouldn't Be: Sticking and Shelf Welds
A stuck pot is a bad afternoon: chipping the foot off the shelf can take a piece of the pot with it. The fix costs thirty seconds.
Wax the foot ring before you glaze, leaving a clean margin a few millimetres above the foot. Then wipe the foot with a damp sponge to remove any glaze that crept past the wax line. Keep that line crisp. A slightly rough foot sanded smooth afterwards looks better than a pot that has to be broken free.
Lids deserve special attention. Wax the gallery and the rim of the lid, or leave both unglazed. Glaze on a lid rim will fuse the lid to the pot, and glazing only the outside of the lid while leaving the inside bare can cause the lid to warp or fit badly after firing. If a piece runs anyway, fire it on a waster slab or a thin coat of kiln wash so it lifts off cleanly. When you sand a fired foot, wear a dust mask — the dust is fine silica and worth respecting.
4. Layering Glazes Without a Test Tile
Layering is where pottery gets exciting and where a kiln load gets ruined. Two glazes that look lovely side by side can run off the pot, curdle, or cool with a crackled, shivering surface that flakes off in the hand.
Test on the same clay body you throw with, fired on the same schedule. Make a small tile, divide it into strips, and apply the second glaze at one, two and three coats over the base. Record the results on the tile itself in pencil. Keep the tiles in a box by the kiln — a library of fired tests will save you more time than any book.
When you do commit, apply the top layer more thinly than the base and stop it well above the foot, leaving a clear margin of base glaze to catch any run. Thin tops, thick bottoms, and a bit of bare clay at the foot is a rule that holds up.
5. Ignoring Glaze Consistency
A glaze that is too thick goes on like porridge, drips in the firing, and hides texture. Too thin and it looks watery, breaks over edges, and never develops the colour you expected. The difference between the two is often a cup of water.
Stir the bucket thoroughly from the bottom before every session, and sieve it regularly to catch hard pan and dried flakes. When it needs thinning, add water a tablespoon at a time and mix well before judging — glaze takes a few minutes to even out, and it is easy to overshoot.
A simple habit is to measure. Dip a small container, weigh the glaze and the same volume of water, and note the ratio; many dipping glazes sit somewhere near 1.4 to 1.5 times the weight of water, but your recipe and clay matter more than the number. What actually counts is that the reading stays the same from one session to the next, along with your dip time. Write both on a card taped to the bucket.
6. Rushing the Firing and Cooling
Pinholes, blisters and blobby surfaces often get blamed on the glaze when the kiln is at fault. Firing too quickly through the early stages traps air and carbon in the glaze layer, and they surface as pinpricks that no amount of extra glaze will cure. On the way down, cooling too fast can cause dunting — that dreadful ping of a pot cracking hours after you thought you were finished.
Follow the schedule your glaze and clay supplier recommends rather than improvising, and use witness cones so you know what the kiln actually did rather than what the controller said. Keep the lid closed until the kiln is properly cool. Opening early to peek at the results is one of the most reliable ways to shock a piece into cracking.
A Short Routine That Catches Mistakes Early
Most glazing problems are prevented in the ten minutes before a pot goes into the kiln. A routine helps:
- Dust the bisque with a damp sponge and let it dry.
- Stir and sieve the glaze; check the consistency.
- Wax the foot, and the gallery if there's a lid.
- Glaze the inside first, then the outside, in thin layers.
- Wipe the foot clean and check the margin against the light.
- Set the pot on a waster slab if the glaze is known to run.
- Note the glaze, the number of coats and the firing on a test tile or your notebook.
None of this is glamorous, and that is rather the point. Glazing rewards the boring parts — the counted dips, the wiped rims, the tiles kept in a box. Do those, and the kiln opening becomes something to look forward to.
Photo: rspata / Pixabay
You Might Also Like
A practical field guide to finding, sampling, and testing wild clay along Italy’s coast, with safe collecting habits and simple tests for potters.
A practical costing checklist for small pottery studios, covering materials, kiln time, labor, overhead, and the wholesale and retail margins that turn a base cost into a fair shelf price.